Section 5: The Data Layer

The Data Layer connects your SvelteKit Application to the WordPress endpoint. We've setup the User Interface of the application, now lets get the card data from WordPress.

In this section we’ll set up the

  • Type Definitions

  • Fetch Utility

  • GraphQL Queries 

  1. TypeScript Type Definitions

What is TypeScript?

TypeScript is JavaScript with types - it adds a type system on top of JavaScript

  • Types are used to describe your data

  • For example: title: string; // Must be text

TypeScript prevents bugs by catching mistakes as you type by keeping track of the type of data being used.

Type Definitions

Type definitions are used to define the structure of data.

  • By doing this the TypeScript compiler knows what types of values to expect (catch errors before the code runs).

  • When SvelteKit makes requests to the WordPress endpoint, it will know the shape of the data that will be returned

Types.ts

  1. Create a types.ts file in src/lib/ and add this code to it

export interface Card {
  title: string;
  featuredImage?: {
    node?: {
      sourceUrl: string;
    };
  };
  categories?: {
    nodes?: Array<{
      name: string;
    }>;
  };
  excerpt?: string;
}

// Response from WordPress when fetching all cards
export interface CardsResponse {
  posts: {
    nodes: Card[];
  };
}

Card Type

Represents a single trading card

  • All fields are typed (string, boolean, nested objects)

  • ? marks optional fields

CardsResponse Type

The structure of the data when fetching ALL trading cards

  • Contains an array [] of Card nodes

  • Includes pageInfo for pagination support (optional)

  1. Fetch Utility

Fetch is a browser API that makes HTTP requests. We’ll use it to retrieve the card data from the WordPress API Endpoint.

Api.ts

Create an api.ts file in src/lib/ and add this code:

import type { CardsResponse } from './types';

const WP_GRAPHQL_URL = 'ENTER_YOUR_GRAPHQL_URL'; 

// GraphQL Queries as stringsx
const GET_CARDS = `
  query GetCards {
    posts {
      nodes {
        id
        title
        slug
        excerpt
        date
        featuredImage {
          node {
            sourceUrl
          }
        }
        categories {
          nodes {
            name
            slug
          }
        }
      }
      pageInfo {
        hasPreviousPage
        hasNextPage
        endCursor
        startCursor
      }
    }
  }
`;


/**
 * Generic function to execute GraphQL queries
 * @param query - The GraphQL query string
 * @param variables - Variables to pass to the query (optional)
 * @returns The GraphQL response data
 */
async function fetchGraphQL<T>(
  query: string,
  variables?: Record<string, unknown>
): Promise<T> {
  const response = await fetch(WP_GRAPHQL_URL, {
    method: 'POST',
    headers: {
      'Content-Type': 'application/json',
    },
    body: JSON.stringify({
      query,
      variables: variables || {},
    }),
  });

  if (!response.ok) {
    throw new Error(`GraphQL request failed: ${response.statusText}`);
  }

  const { data, errors } = await response.json();

  if (errors) {
    throw new Error(`GraphQL error: ${errors?.message || 'Unknown error'}`);
  }

  return data as T;
}

/**
 * Fetch all cards from WordPress
 */
export async function getCards(): Promise<CardsResponse> {
  return fetchGraphQL<CardsResponse>

  1. In your code from step 1 above, update WP_GRAPHQL_URL with your site's GraphQL URL

    • Its on line 3 const WP_GRAPHQL_URL=

    • You can find your GraphQL url in your WordPress Admin > GraphQL > Settings
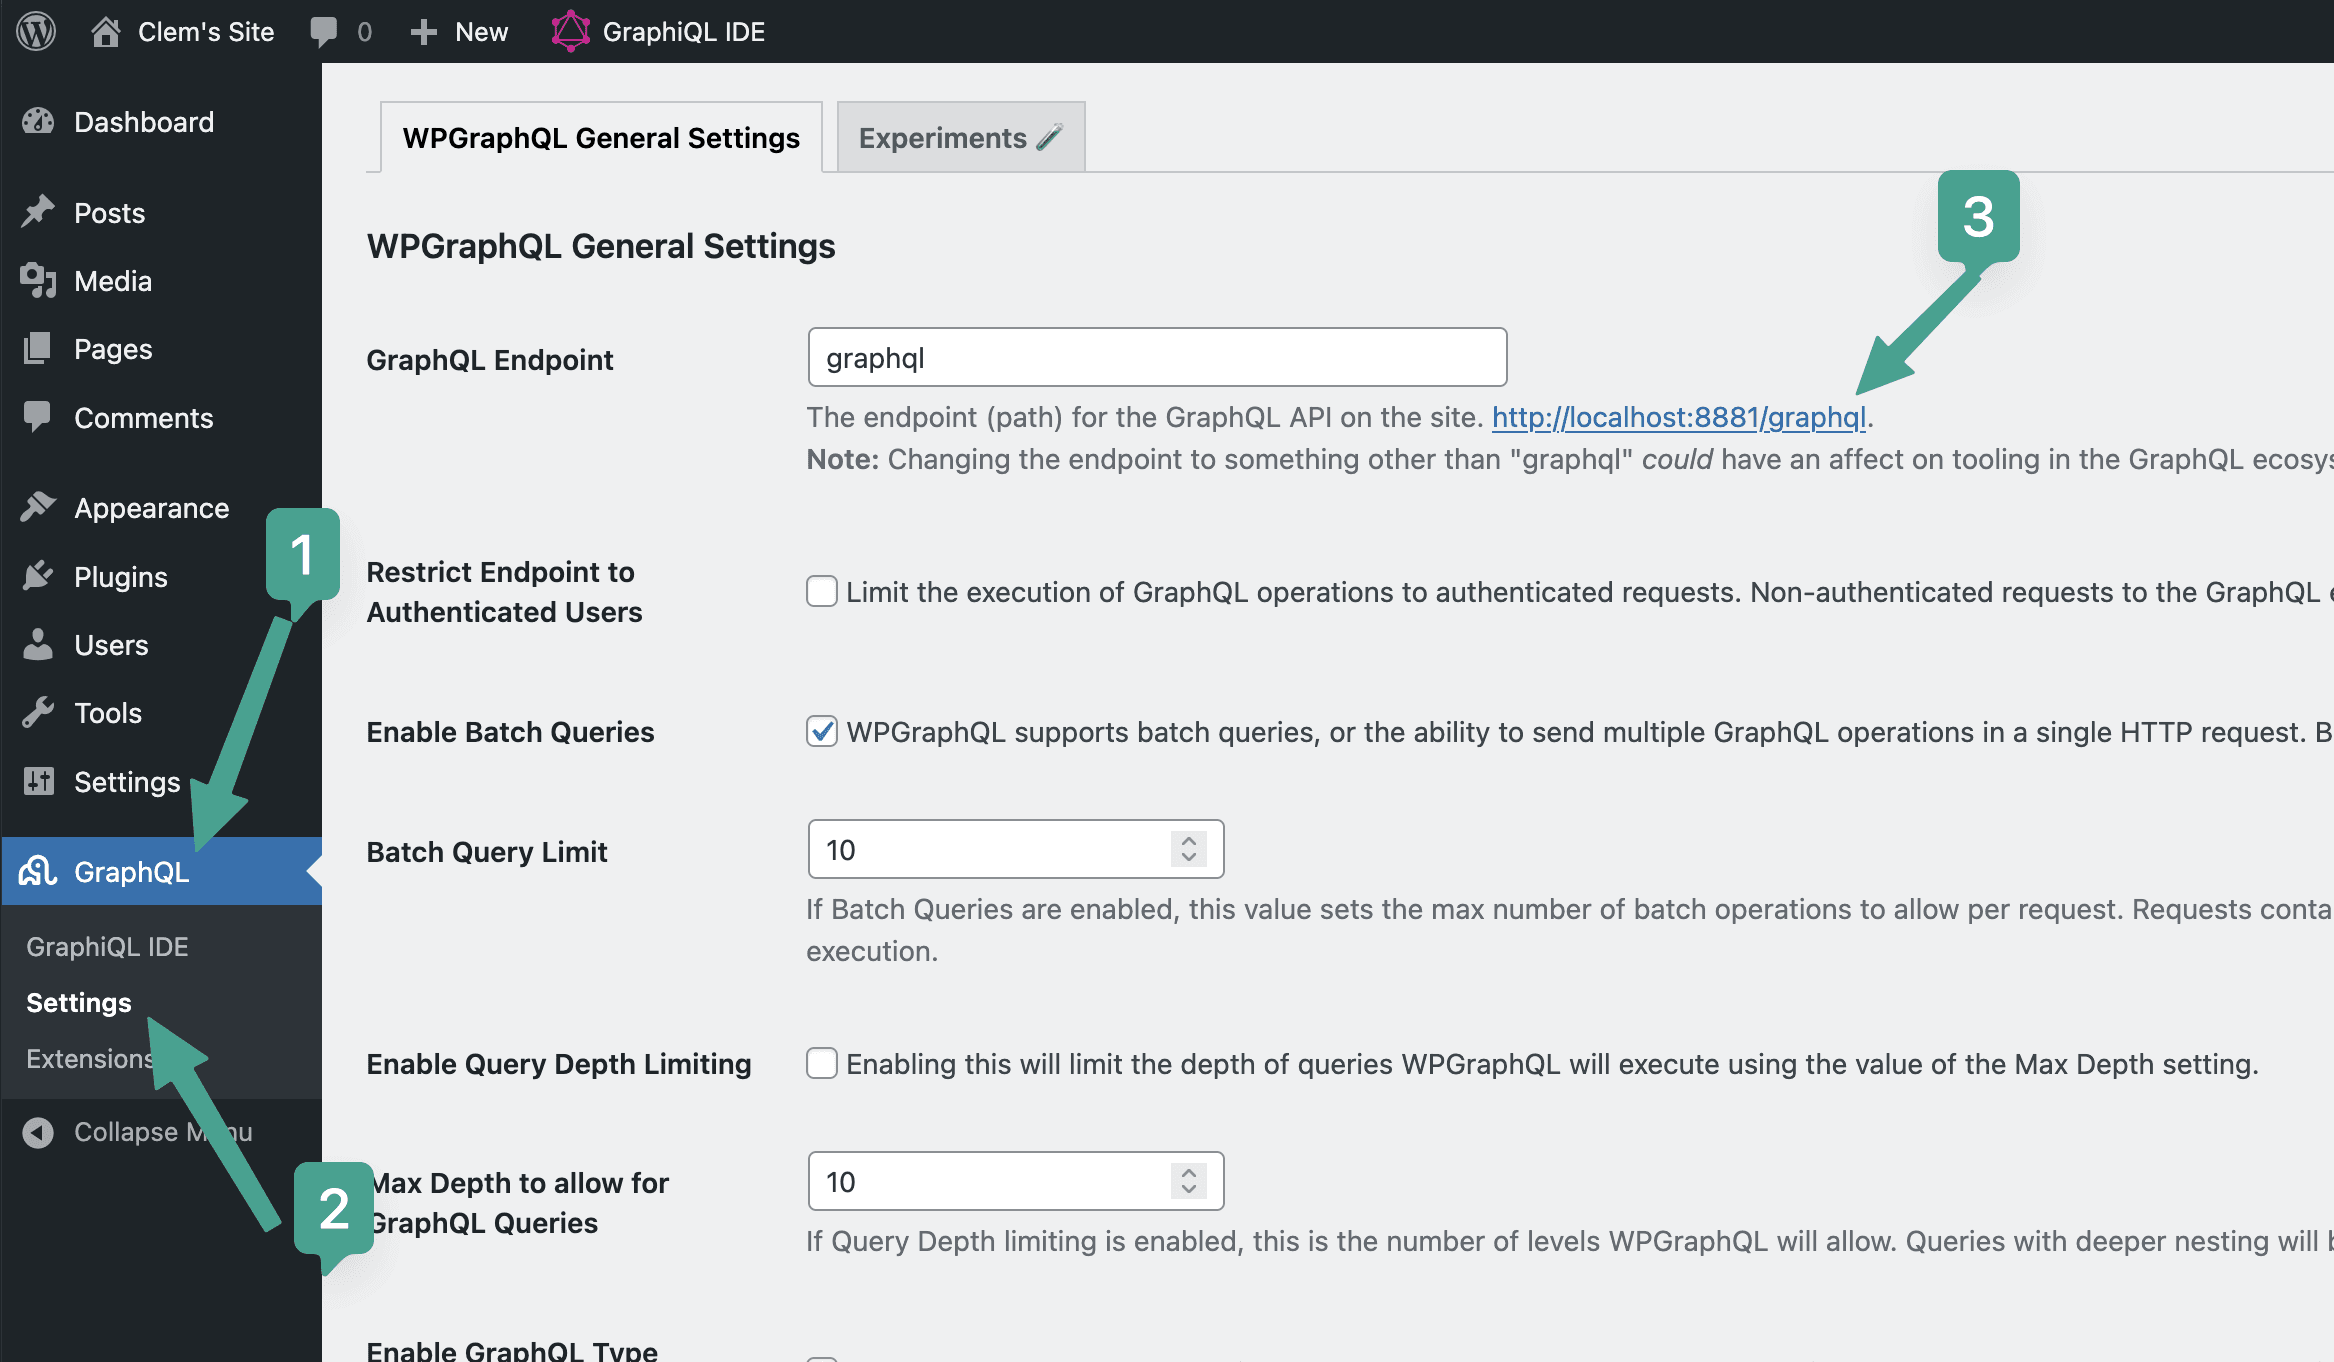
  1. Testing your setup

Test the WordPress endpoint

  1. Visit your WordPress GraphQL endpoint url in your browser

  2. You should see the GraphiQL IDE from WPGraphQL

  3. If you see the IDE, your endpoint is reachable


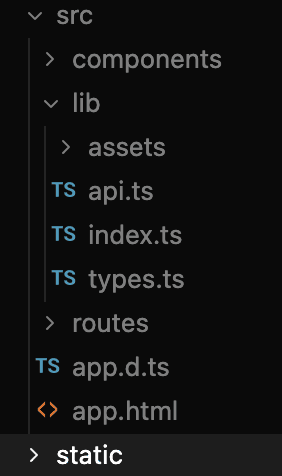
After completing this section, your src/lib/ folder should look like:

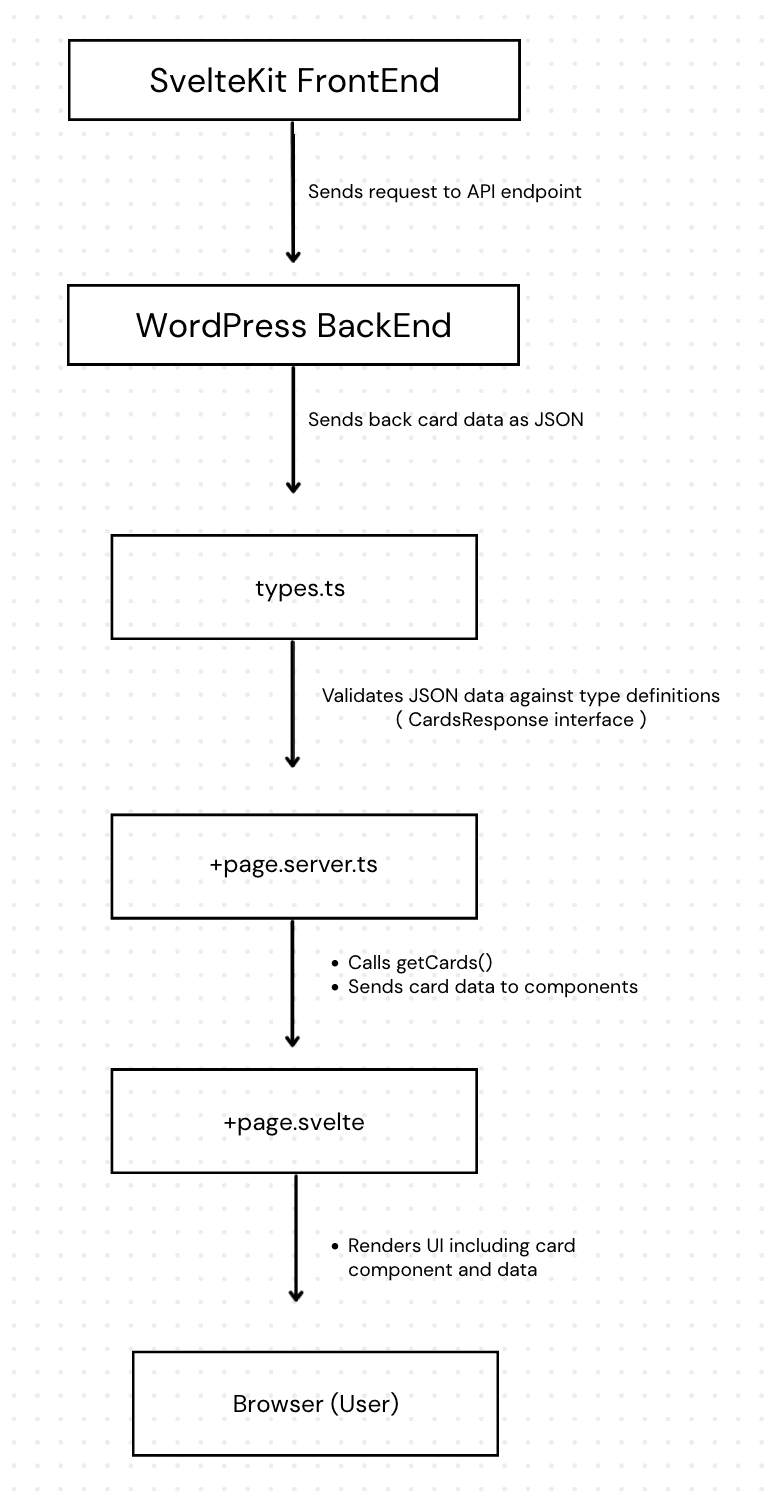
Understanding the Data Flow

Create a free website with Framer, the website builder loved by startups, designers and agencies.